Managing meeting spaces efficiently is crucial for any organization. Microsoft Outlook offers a seamless way to book conference rooms, ensuring that your meetings are well-organized and that you have the necessary space reserved. Here’s a step-by-step guide to help you add a conference room reservation in Outlook.
Open Outlook Calendar
First, open your Outlook application and navigate to the Calendar view. You can do this by clicking on the calendar icon at the bottom of the navigation pane.
Create a New Meeting
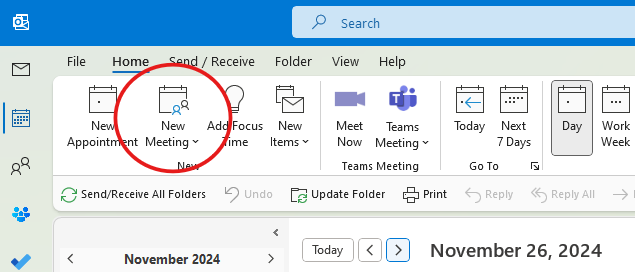
Click on the New Meeting button in the Home tab. This will open a new meeting window where you can set up the details of your meeting.
Set Up Meeting Details
In the new meeting window, fill in the necessary details:
- Subject: Enter the purpose of the meeting.
- Attendees: Add the email addresses of the people you want to invite.
- Date and Time: Select the start and end times for your meeting.
Use the Room Finder
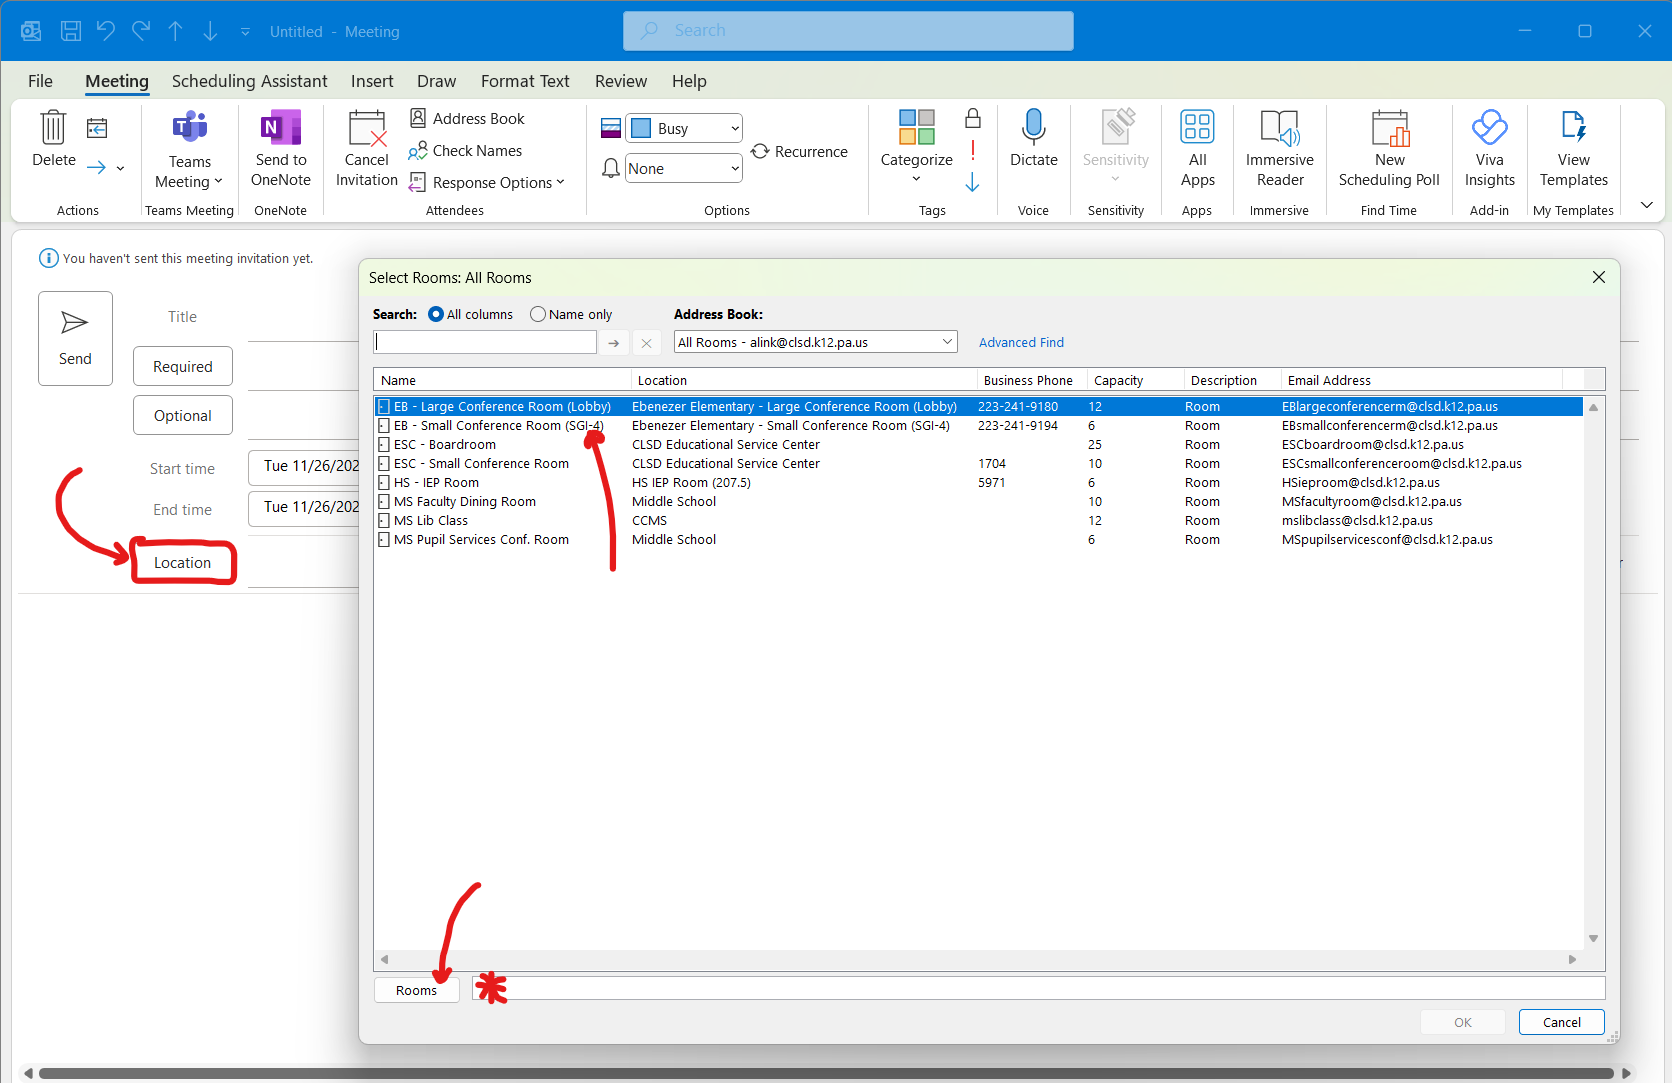
To add a conference room, click on the Location button located below the Start time and End time fields. This will open the Select Rooms pane.

Select a Conference Room
From the list, you can browse through available rooms. Buildings are coded. (ie. EB = Ebenezer) You can filter rooms based on location, capacity, and other features. Once you find an available room that meets your needs, double-click on it to add it to your meeting.
Optional: Check Availability
Use the Scheduling Assistant to ensure that the selected room and all attendees are available at the chosen time. The Scheduling Assistant will show you the availability of all participants and the room, helping you find the best time slot.
Send the Meeting Request
After confirming the details and availability, click Send to send out the meeting invitation. The conference room will be booked, and all attendees will receive an invitation with the meeting details.


